


Now that we have a mannequin in the size we want our reproduction to be, I can start working on draping that pattern.
I could have concentrated on the pattern in the original size and graded it up (grading is the process by which you systematically make a pattern bigger), but my concern was that the proportions would be so different in such a different size, and for a modern body, that the pattern would be ill-fitting. Also, this way I can work on the 2 patterns in 2 sizes simultaneously, so perhaps we can get our reproduction done sooner. In fact, I don't even have a mannequin here that is small enough to drape the original size, but I have access to a child's mannequin that I will bring in soon. Working with the 2 different bodies in 3D will be very helpful to figure out the nuances of the pattern pieces.
I'll be working from the inside out to drape the dress, layering each piece on top of what's below. So, I've begun with the inner waistband, and then worked on the bodice lining pieces.
 |
| From Research Process Part 1 - 1910's Franklin Simon gown |
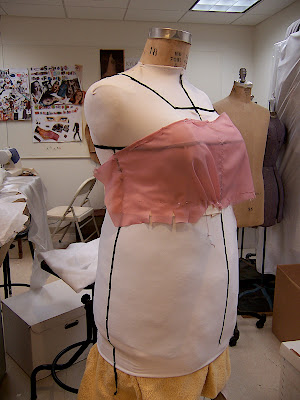
The next layer is what I refer to as the "bodice band" - on the original dress it is a strip of off-white satin with edges finished in such a way that I believe it is simply a very wide satin ribbon. It encircles the whole bodice, with a closure at the center back, and has very little shaping (just a few small pleats at the front).
 |
| From Research Process Part 1 - 1910's Franklin Simon gown |
 |
| From Research Process Part 1 - 1910's Franklin Simon gown |
No comments:
Post a Comment