Showing posts with label conservation. Show all posts

Sunday, May 31, 2009

Costume History meets Chemistry

What are the different fabrics, trims, and hardware used in the dress?
Where were they produced, under what conditions, and at what cost?

Three weeks ago, on Friday, May 15th, Holly Hummel and I (Arden Kirkland) had a wonderful visit to Vassar's Chemistry Department. We met with Stuart Belli and Edie Stout, who were very generous with their time and introduced us to two different instruments, which in turn introduced us to a whole new world of fiber analysis.

First they introduced us to the Fourier transform infrared (FTIR) spectrometer, which measures how infrared light is absorbed by a substance. This is a non-invasive technique. We started by placing small fragments of fabric in the spectrometer (one at a time) to analyze them, but later in our session Edie was able to test the sleeve of her shirt while she was wearing it! This has great potential for analyzing fibers of textiles without needing to remove a sample. The most common method for fiber analysis in a costume shop (vs. a lab) is to do a burn test, which requires that you remove a sample from the textile and essentially destroy it. Standard microscopy is also possible, but even for that I believe you would usually want to cut a small sample to place on a slide. A non-invasive technique is greatly appreciated.

By comparing our results with those from a known sample, we were able to easily recognize patterns and determine composition. Our samples included the silks from the dress discussed in this project, and a few other samples. They had samples of silk, wool, and cotton that we could compare. We also discovered that Holly was wearing a linen shirt, so we analyzed her shirt (again, while she was wearing it) to have a linen to compare, as well.

We were pretty sure that the samples from this dress were silk, and the spectrometer easily confirmed that. Here's the result from our analysis of the skirt lining, which shows a typical pattern for silk:
From Chemical Analysis

On the simplest level, this makes it very easy to determine if something is silk or wool or cotton or linen, etc., and in a non-invasive way. On a more complex level, we see a potential to look for subtle differences in a larger sample to determine more specific variations, for example identifying regional differences in textiles, or dating textiles by identifying other compositional factors involved in the manufacturing of different time periods.

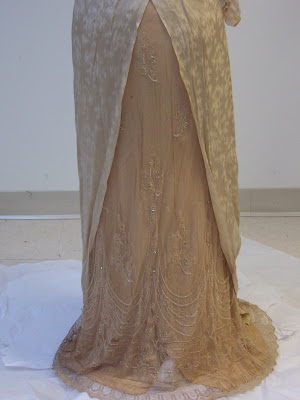
Next, we went upstairs to experiment with the XRF (X-ray fluorescence) spectrometer. We inserted the same samples. In this case, the instrument was able to analyze the presence of certain specific elements. This was particularly interesting for our silk samples, which we believed had been weighted with metallic salts, as was common in the late 19th and early 20th century. This weighting unfortunately leads to an increased rate of deterioration. We were hoping to prove that they were weighted, and to find out what they were weighted with.

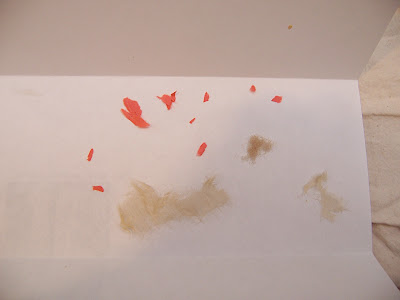
Indeed, all our silks were found to be weighted at least with zinc. Our worst offender, the silk gauze (badly deteriorated) that formed the sleeves, was found to have not only zinc, but also iron, copper, potassium, and lead. Here's the analysis of that gauze:

From Chemical Analysis

We're very excited about the potential to analyze more of the textiles in our collection. There's a lot more to be figured out here, but this is a great beginning. Next comes the "So What?" Why add zinc or copper or lead to silk? How were they added? We've started by looking at similarities, but over time it may be more interesting to look at differences. We're hoping to find some students who are interested in both science and design who might want to take this on as a project. Design meets Science! Costume History meets Chemistry! This is a great example of what a liberal arts education is all about.

Monday, August 18, 2008

Steaming and Mounting the Dress

How can we work with this dress without causing it further damage?

Today I had the assistance of the lovely Miss Lydia Palmiotti, a Poughkeepsie area high school student who has offered to volunteer on this project.

The first thing I asked Lydia to do was to steam the dress. I am hoping that a little steam will help to refresh the fibers of the dress and reduce their brittle nature. With the dress laid out on the table, she carefully inched the steam over the entire dress, working in rows up and down, then over. It is tricky to use the steamer with something flat on the table, as it is designed to work with a hanging garment. She had to keep a careful eye out for condensation on the head of the steamer, and wipe any drips onto a clean white towel before they landed on the garment.

Next Lydia helped to take several basic measurements of the dress, to determine the basic size of the original wearer, and therefore what size mannequin to put it on. Her waist measures about 21"; underbust 25.5"; bust 34.75"; skirt side length 42". This is smaller than any of our commercial dress forms, but luckily we have an alternative. In the mid-90's we mounted a few exhibitions and included several objects that were too small for our dress forms. To show these objects, students helped to build special mannequins to size. We located one such mannequin that was small enough, and brought it into our workspace, then put a slip over it (to protect the dress from the uncovered wood on the mannequin), and laid tissue paper on the floor around the base (to protect the dress from touching the floor).

Then we were ready to mount the dress. While one of us held the bodice of the skirt (by the bust area, as the sleeves are too delicate), the other held the skirt, carefully opening the skirt and putting it over top of the mannequin, then lowering the dress down into place. One problem with our historic mannequins is that they don't have proper shoulders. In this case, the dress was longer waisted than our tiny mannequin, so we had to build up the shoulders with tissue paper for the dress bodice to hang better. Even so, I believe the bodice bloused over the waist sash a little more than it would have for its original wearer. Also, even on this tiny mannequin, it put too much stress on the fabric to hook the original closures at the waist. Instead, I carefully pinned the bodice overlap with fine silk pins. I also pinned the coral trim on the waist sash in a few places that it was torn off and dangling (several of these bits have since come off entirely). After all this, the dress was also a little long for the mannequin, and fanned out on the floor about 2.5". It is likely that the hem hit just above floor length on the original wearer, who must have been about 3" taller than our mannequin.

From 1910's Franklin Simon Gown


With the dress properly mounted, it provided a wonderful opportunity to record what it is really like in 3 dimensions. In the next entry you'll find more sketches and photographs of the dress on the mannequin.

Her time in 3D was limited, though. As helpful as it was to see her on the mannequin, it was not safe to expose her to the force of gravity for too long, especially considering the weight of the beadwork on the lace skirt layer. At the end of our workday, I was helped by a Vassar student, Emily Liemkuhler '10, to carefully take the dress off of the mannequin, and put her back in her muslin cover - "tucking her in for the night," as we've come to see it.

Friday, August 8, 2008

Patterning Technique

Let's stop for a minute and talk about the choices for how to take a pattern from this dress.

What would the flat pattern for the dress look like?

There are essentially 4 different ways to figure that out.

1. Draping - looking at the lines and shapes of the original and trying to reproduce them by placing fabric on a mannequin of the same size
2. Tracing - laying a section of the garment out flat and tracing its shape onto paper or another fabric
3. Rub-off - placing fabric over each piece and rubbing chalk over it to find the placement of seams, etc.
4. Gridding - after basting thread lines into each piece to mark the grain of the fabric, measuring out from the lines to the seams, etc., (at regular intervals) to find the shape of each piece

Which one is best for this project? There's no right answer, so we're going to use all 4. Each part of the dress will be better served by a different technique. Accuracy is not the only concern. We need to think about which technique will be least invasive, to preserve the original object.

What are the pros and cons for each?

1. Draping - would be the least accurate for an exact reproduction, but would be the least invasive in terms of preserving the original object.
2. Tracing - a little more accurate, and not very invasive, but only will work with very flat, simple sections
3. Rub-off - middle of the road for accuracy, but the most invasive
4. Gridding - would be the most accurate for an exact reproduction, but somewhat invasive, and very time-consuming, requiring a great deal of concentration

Wednesday, August 6, 2008

Conservation?


From Research Process Part 1 - 1910's Franklin Simon gown

How can we work with this dress without causing it further damage?

Today I sat down with the dress again to get to know it better. With every step I find more places that the dress is damaged. Small pieces of the deteriorating fabric have fallen off in several places: bits of chiffon and net that lined the lace in the bodice, pieces of the skirt lining, and especially the coral silk trim on the waist sash. Above is a picture of some of the bits.

As I start working on patterning today, I'm concerned that the dress will be hurt by being handled so much. There are some logical tears, such as the top of the front slit of the skirt,but I'm mostly worried about how brittle the fabric is. The skirt lining seems to flake off in your hands. Yet, other layers of fabric are in excellent condition. It's fascinating to see how age affects textiles differently, right next to each other in the same garment. I suspect the silk lining may be a weighted silk, as was common in that period. The metals added to the silk cause it to have a much higher rate of degradation.

Here's a slideshow with some images of the deterioration.


After my work today I've come to 2 conclusions:

-we need to try to humidify the dress with steam to reduce its brittle state
-we need to work on the pattern in a different way than I had originally planned. Rather than working closely with the garment to take exact measurements, we will refer to it with only the gentlest measurement taking, and drape the pattern on a mannequin to check the shape.

Tuesday, July 29, 2008

First Steps

From Research Process Part 1 - 1910's Franklin Simon gown


How can we work with this dress without causing it further damage?

To begin our work with the dress today, first I needed to think about conservation and create a safe space to work with it:

-measured the overall length and width of the dress as it lays in the box /on the table
-cut a piece of washed muslin almost 3X the length of the dress, and finish the raw edges of it (this will serve as a cover/sling to protect the dress as we work on it)
-with the muslin laid out on the table, I brought the dress over from the storage area and laid it out carefully on top of the center of the muslin (when the dress is not being studied, it can be covered up by overlapping the long sides of the muslin over top of it)

Sunday, July 27, 2008

Questions

The more we work with this dress, the more we want to know about it. As we go, we keep adding to a list of questions we have about the dress and its history, and our objective with this project is to answer as many of them as we can! That way a student who tries on the reproduction can get a detailed picture of the world from which the dress came.

What follows are our questions, in no particular order, followed by a label in parentheses which indicates the category this question falls under. From each blog page, the sidebar on the left has a list of all these categories, kind of like an index. You can use that list to navigate to a particular question that interests you.

Who wore this dress, and for what occasion? (wearer)
What year was the dress made and worn? (period)
What region is the dress from? (region)
Where was it purchased / made? (source)
What underwear would have been worn with this dress? (underwear)
What accessories would have been worn with this dress? (accessories)
Who made this dress, and under what conditions? (production)
Was the dress made to order, or ready to wear, or something in between? (production)
What construction techniques were used to make this dress? (construction)
What would the flat pattern for the dress look like? (pattern)
Has the dress been altered since its original creation? (construction)
How much did this dress cost? (cost)
How much were workers paid to make it? (cost)
What are the different fabrics, trims, and hardware used in the dress? (materials)
Where were they produced, under what conditions, and at what cost? (materials)
Where can we find similar fabrics, trims, and hardware to reproduce the dress? (materials)
How can we work with this dress without causing it further damage? (conservation)
What size person originally wore this dress? (size)
To what size should we reproduce the dress? (size)
What would the dress have looked like in 3D? In motion? (images)

Each of these questions has several "sub-questions," and we will try to address each question in at least one blog post. You can navigate through our blog posts chronologically, or use the "Label" list as an index to go right to the sections that interest you most. If you would like to add any questions, or help propose some answers, please add to the comments below (or on the pages for individual questions).